Showing posts with label Hair Pieces/Extensions. Show all posts

Tuesday, April 17, 2012

Hair

Clip-ins Revisited


After my sew-in experience a few weeks ago, I decided, yet again, that I am a clip-in kinda girl! I love the ease of clip ins. They can help you add length or fullness in no time, and there is no thread or glue to mess with. They take very little time and commitment, for all you have to do is clip 'em in and clip 'em out!

Friday, April 13, 2012

Hair

Fiyah


In my March Beauty Haul, I shared the extensions I purchased and what I planned to do with them. I dyed them red, then had a few tracks sewn in the back for a peek-a-boo effect.

Friday, October 14, 2011

Hair & Makeup

Date Night: Contouring & Spanish Wave

Hey everyone! I'm coming at you today with another "date night" look. If you recall, I shared the disastrous details of my initial attempt at using waist length clip-in hair extensions in My 18" Extensions...#FAIL! post. Anywho, I said I'd share the results of my second attempt, and I'm happy to say that the revisions I made did the trick! Of course, this date night look wouldn't be complete without some makeup, so I put together the look you see at left.

The makeup look, which is a smokey pink eye, was inspired by the
Victoria's Secret Inspired Makeup tutorial by PrettiRell. Although I can't take credit for the eye look, the highlighting and contouring was all my idea ;-). No seriously, I love highlighting and contouring my face when I go out at night because it gives the face a nice structured look.

To see how I contoured my face and went from bra/mid-back length to waist length hair, click the "read more" button. **Warning! This post is pic heavy, so slow loaders beware!

Monday, October 3, 2011

Hair

My 18" Extensions...#FAIL!


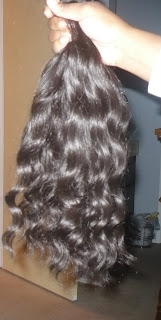
I recently shared the 18" Spanish Wavy hair I purchased as part of my latest beauty supply store haul. If you recall, I also shared in that post how I had already made clip-on extensions with the hair, but they turned out to be a FAIL. Well, today I'm going to share the reasons why things didn't go so well:

Friday, April 15, 2011

Hair & Makeup

Rihanna Inspired Look: Silver & Black Eyes with Phony Pony


Hey divas! Do you recall how I shared some fabulous pics of Rihanna at this year's All Star Game in my post titled All Star Swag? Well I mentioned how much I loved her look and was gonna cop it, and I finally did! Check out the video tut and my interpretation of the look below.


Hair products used:

-Elasta QP Olive Oil and Mango Butter Moisturizer (to keep ends moisturized under phony pony)
-Drawstring ponytail in style KHP-0630, color #2 by Fashion Source Wig Collection

Makeup products used:

Eyes
-Too Faced Shadow Insurance Primer
-Sparks eye shadow by Ulta
-Uzi eye shadow by Urban Decay (I Love NY palette)
-Perversion eye shadow by Urban Decay (I Love NY palette)
-Center color in the EP24 Unforgettable palette by L.A. Colors
-Line Stiletto eyeliner in black by Maybelline (upper lash line)
-Smolder eye kohl by MAC (lower lash line)

Face
-Pur Mineral 4-in-1 powder foundation in Deeper
-Concealer in Bronze 1 by Mary Kay
-Blot powder in dark by MAC
-Loverush blush by MAC

Lips
-Sweetie lipstick by MAC
-Date Night Dazzleglass lip gloss by MAC

Pics of the finished look:


Friday, June 18, 2010

Hair

Homemade Clip-in Hair Pieces

Last year I posted a video titled, Clip-in Hair Extensions, in which I demonstrated how I use clip-ins to add color, volume, or length. Since that video aired, many of you have asked me where to purchase the extensions. Well, today I am showing you how to make your own. If you recall, I actually did a picture tutorial for this on my blog a while back in a post titled, My Latest Beauty Haul & Homemade Clip-In Hair Extensions. However, many of you requested that I do a video on this, so here it is. Enjoy!

Sunday, December 6, 2009

Hair

My Homemade Clip-In Hair Extensions: The Results


I mentioned that I would share the final look of my homemade clip-in hair extensions in My Latest Beauty Haul & Homemade Clip-in Hair Extensions post, so here is how the process went...

1. After straightening and curling my hair with a flat iron, I created a part where I was going to apply the first track:

2. Here is what it looks like with the first track in:

3. I then made a second part, just an inch or so above the first to indicate where the next track would go:

4. And here is what it looks like with the second track in:

5. The final look:


I definitely think I'll go for extensions in 1b next time, but overall, I'm pleased with the results! BTW, for those of you who requested a video for this, I will be recording one soon, as I wish to share what I learned so you don't have to make the same mistakes I did. Until then, smooches!

Friday, December 4, 2009

Hair

My Latest Beauty Haul & Homemade Clip-In Hair Extensions


I'm going out this weekend for a special event and want to spice things up a bit. Thus, I went to the beauty supply store yesterday and bought the following:
  • 1 pack of wavy, synthetic hair on the track ($9.99)
  • 3 packs of wig clips (2 per pack for $1.99/pack)
  • 1 sewing needle (located inside the gray foil that looks like gum. It cost me $0.99)
  • #76 red cherry false eyelashes
I've been wanting to create my own clip-in hair extensions for quite some time now, and since I haven't been able to find the ones I used in my Clip-in Hair Extensions video, I figured making my own was the best way to go.

I didn't want to spend a lot of money, and am therefore glad that I was able to find hair with the following qualities at a low price:

The hair up close
  • Wavy texture (I figured the texture would blend better with my real hair than bone straight hair would)
  • Washable (This hair can be washed and re-used)
  • Heat resistant (Although this hair isn't human, it can withstand the use of heat-styling tools, at low temperatures of course :-)).
I was a little disappointed they didn't carry the hair in 1b, my go-to-color, as I had to opt for number 2 hair, which is more of a dark brown than an off black. Yet, since I believe super black hair can look fake, and my hair is highlighted in the front, hopefully I won't have a problem blending the dark brown in with my real hair.

My current color: black with reddish brown highlights in front

The wig clips are what I'll be sewing onto the tracks:


Luckily, the pack of hair came with a spool of weave thread:


Although I purchased a needle used for weaving, I later discovered that I only needed an ordinary sewing needle (which I already had at home), as the weaving needle's head is too large to fit through the holes inside the wig clips.

To create the clip-ins, I simply placed the track up to my head to take two measurements: The width of my head around the occipital bone (lower part of my head) and the width of my head a little below the crown area:

Occipital bone width

Just below the crown width

This is how much hair I had left over. I can therefore make many more tracks with this once I've fried these, LOL!

After cutting the tracks to fit the width of my head, I then started sewing the wig clips on to the track just as you would sew a button on a shirt:

Sewing the clip on the track

Here's a pic of the large knot I had to create at the end of the thread, as the holes in the wig clips are too wide for a standard knot.


I probably could have gotten away with doing just two clips on the track with the shortest width, but I want these suckers to stay on, so I put three on each track for added security!

The finished product

Here's what the clip-ins look like when put into position on the back of my head. Of course it'll look better with my real hair blended in, but this is just so you can see how well I measured the tracks, and what the length of the hair will be like:

My hair up in a messy bun before clipping in the pieces

The pieces clipped in below my bun
I plan to curl my hair and the synthetic hair so that it all blends together. I'll post an update Sunday (yes, Sunday) so you can see how it looks with my hair done. Wish me luck!

Friday, March 20, 2009

Hair

Clip-in Hair Extensions

Although I absolutely love my real hair, there are times when I like to play with extensions. They're a great way to add volume, length, or just experiment with color without sacrificing the health of your hair, or making a major commitment.

Below is a video tutorial on the hair extensions I used to complete my makeover/Valentine's Day Look for 2009. I hope you like it ;).


Pics of the finished look: